Now, there are roughly a billion ways to do any one thing in Photoshop. When it comes to color correction, there may even be two billion. But today I just want to look at one particular method, using the Curves adjustment layer to correct color.
A couple of caveats: I haven’t installed CS6 yet, despite it sitting here on my desk. This tutorial uses CS3, but any version from CS2 on will work just fine. The buttons might be in slightly different places, but they are there. Secondly, though you could do this destructively, I prefer to use Photoshop’s non-destructive Adjustment Layers. Especially because I change my mind like the wind in Wyoming changes direction (that’s a lot).
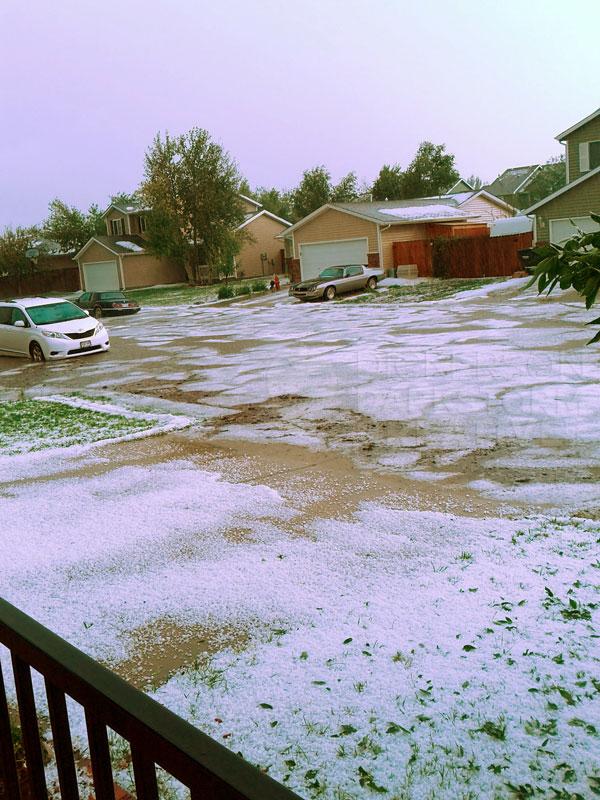
Here’s the victim, a photo taken from my tablet during the massive hailstorm that hit our small town awhile back. The tablet had a blue filter on. Frankly, the awe-inspiring storm was way too interesting to mess around with the color settings. Click on all the images for larger versions.
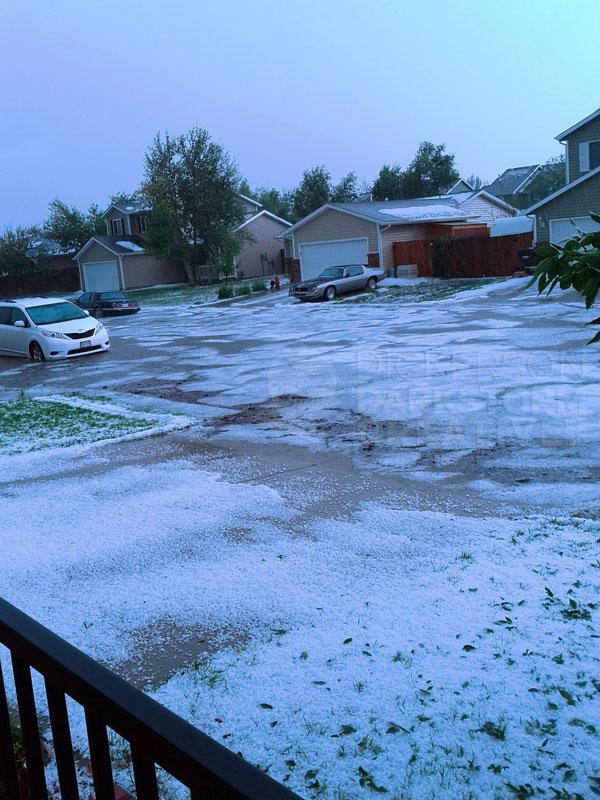
Yeah, that’s blue as all-can-be, so it’s time to make some adjustments. A last caveat, since this is a quick tutorial, I’m sure I could get more accurate at the end. But it’s pretty good, so I’m okay with that. Make sure, too, that you go to Window menu and activate the “Info” palette. That’ll come in handy.
To start, I go to the bottom of the Layers palette, and choose my Curves adjustment layer (in the “yin-yang” looking button). It adds a new adjustment layer above our photo layer (natch), with a mask if we decide to use it later (we don’t).
If you look at the Curves pop-up window (below), you can see the histogram. Histogram is a fancy way of talking about the gray levels in an image. In this case, it’s the overall gray levels of the RGB image. You could use curves to adjust the individual red, green, and blue channels if you’d like, but that’s not what we’re going to do for this.
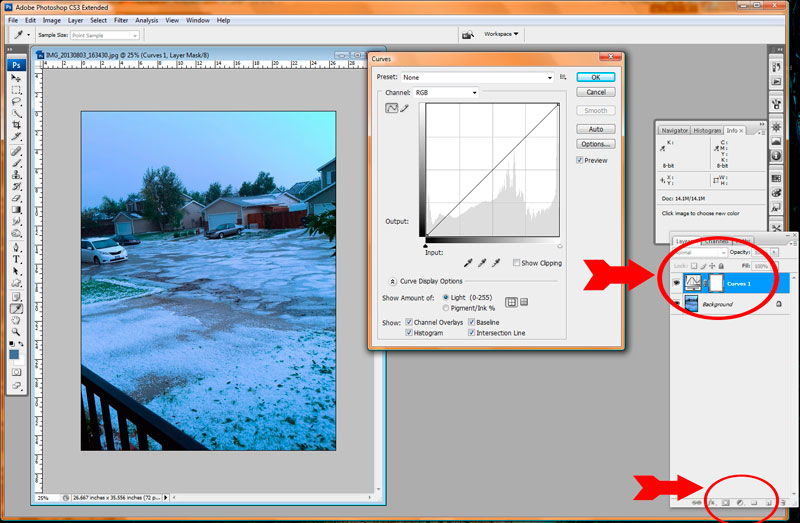
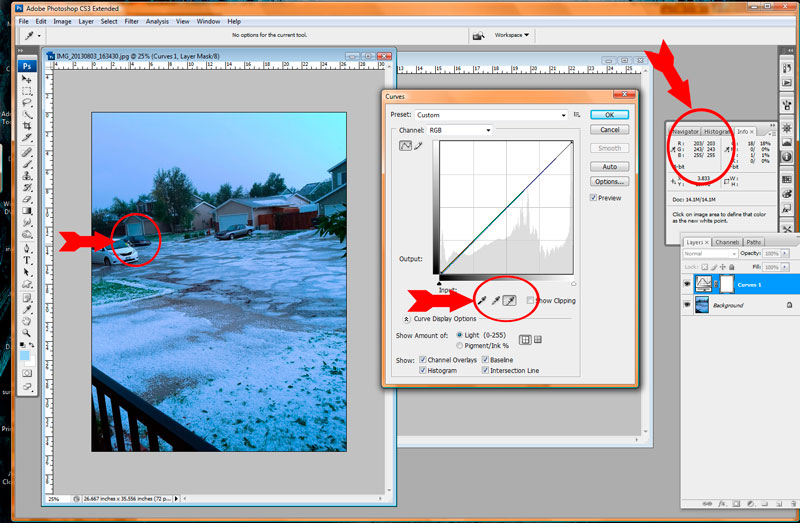
In the Curves window (CS3), you’ll see three eyedropper icons. Those represent the Black Point, Gray Point, and White Point of the image. I’d like to say those are pretty fancy, but no, they are just like they sound. The black point is the darkest (0 on the scale), white the brightest (255 on the scale), and gray the midtone.
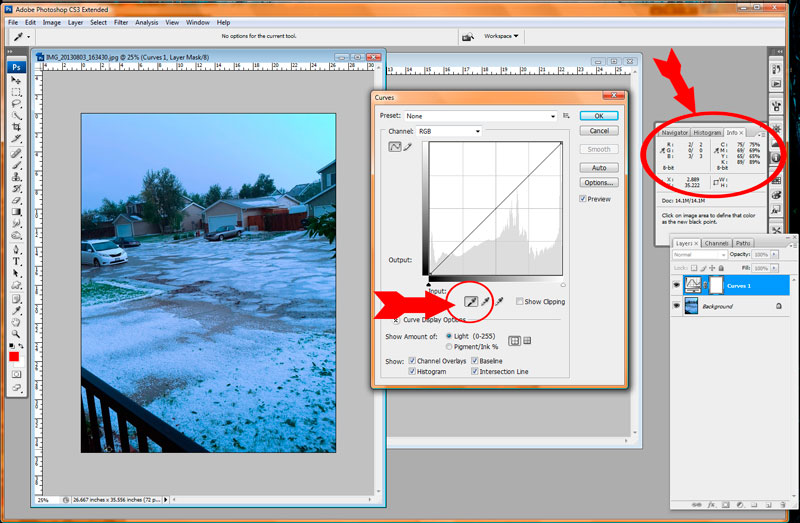
We’re going to use these eyedroppers to adjust the image for us. The Info palette is going to show us the RGB (and CMYK) values in the image as we hover over them. We click on the Black Point eyedropper, and then try to find the darkest point in the image. In this case, that’s in the railing in the foreground.
It’s not a perfect 0 0 0, but that’s okay. Our choice is close enough, as 2 3 0, which means I have 2 levels of Red, 3 levels of green, and 0 levels of blue (out of 255 levels for each color). That’ll darken the works slightly, but not enough that it’s a problem. In some cases, we might even like the effect.
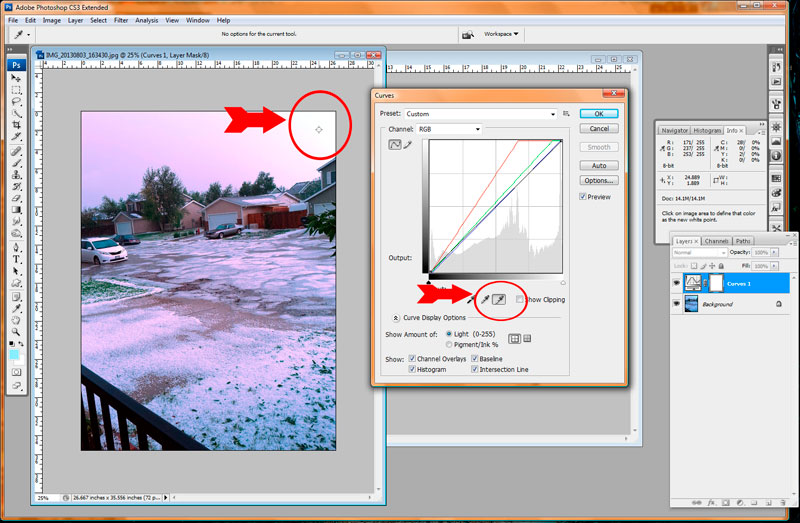
Now we’re going to switch to the White Point eyedropper, and try to find the brightest point. Here’s where it starts getting a little trickier. Each eyedropper can be tricked by a color, and that has some… interesting… effects. In the case below, I purposely picked the upper right corner of the image as the brightest point. That area was filled with blue, so Photoshop attempts to use that data to alter the image.
By doing so, the blue cast interferes with our choice, and casts the complimentary magenta color across the rest of the image. Which is terrible, and makes me think of cotton candy.
So, when we choose the white or gray points especially, we need to try and stay out of the color business. Look for a section that is more or less white or gray. The black point can also be affected, but since it is usually so dark it doesn’t tend to affect things as much.
Instead, I picked an area on the white van to the left. To be fair, I could go on and on about cast colors from the storm, reflected light from the leaves and branches, and so on. But we’re working with the perception of light, just as much as the exacting nature of a true white point, so some leeway is expected. The white van would have all kinds of colors bouncing off of it, but we know that it is indeed a white van, so we can accept the perception and move on.
You’ll see below (you may have to click on it and look) that the RGB values are pretty close to 255 for each color, but not exactly. You could try to find the true 255 255 255 point, but we’re also trying to correct this image. There isn’t enough contrast in it, so we pick a point that’s somewhat less than true, so we can adjust the image.
On the white van, I’ve chosen the driver-side mirror as the white point. Here’s what happened when I picked it:
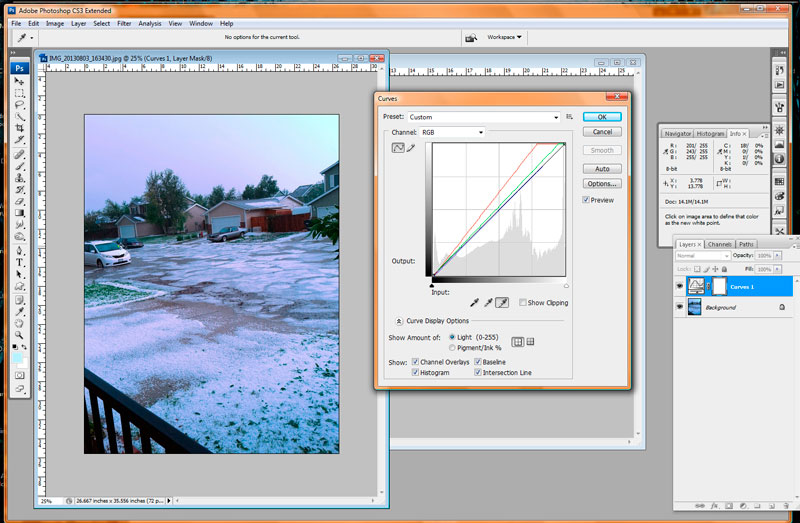
That brightened our photo nicely, and killed off a fair amount of the blue cast. So, now we move on to the gray point.
The gray point is very susceptible to color shifts, which we can use to our advantage. But it can also be our downfall. Case in point, in the image below I picked the far left side of the sky as my gray point. It’s gray value is probably pretty midtone, as it isn’t that bright or that dark.
However:
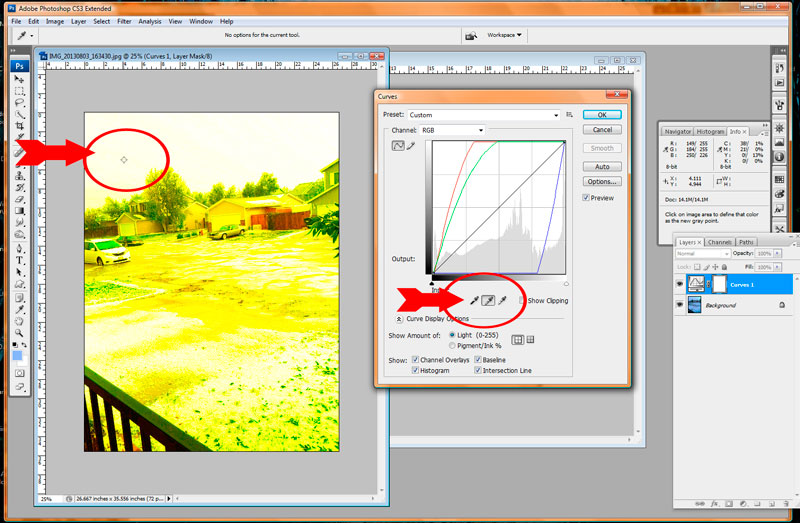
Ugh. That gray point choice messed everything up. Just look at the histogram in the curves window, it looks like someone stomped the crap out of it.
We can use the gray point for color shifts, we just have to be a bit more careful about it. Look through the image to find a section that you believe is gray in real life, or close enough. It’s okay to let it shift colors some, as you see fit. There’s a certain creativity to this technique, about what you want to see in the image, so a little trial and error is expected.
After trying a number of gray points, I found one that I liked in the street:
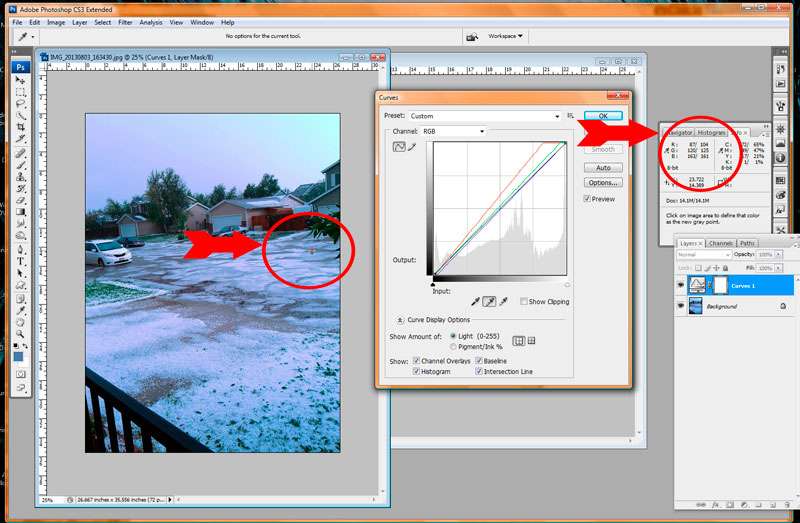
On selecting that, here’s what we ended up with:
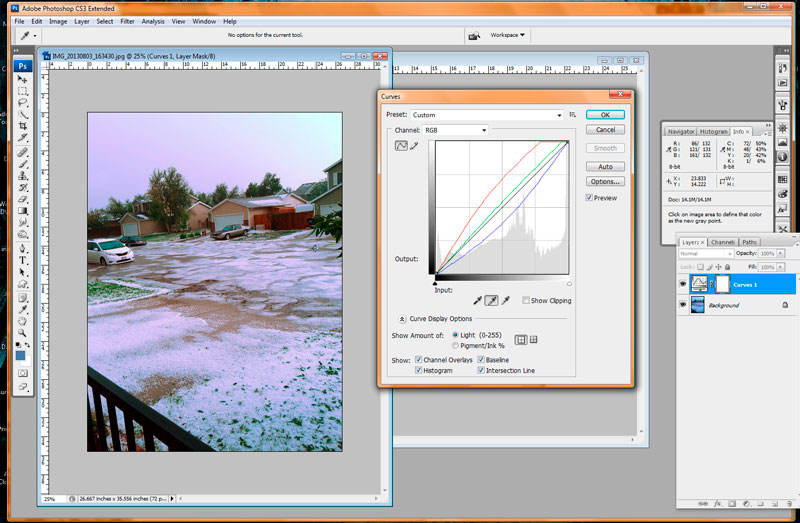
Which isn’t bad at all, though a bit strong on magenta. We could spend more time, going back and forth on it, to get what you want. From here, you could keep adjusting the curves to get what you want.
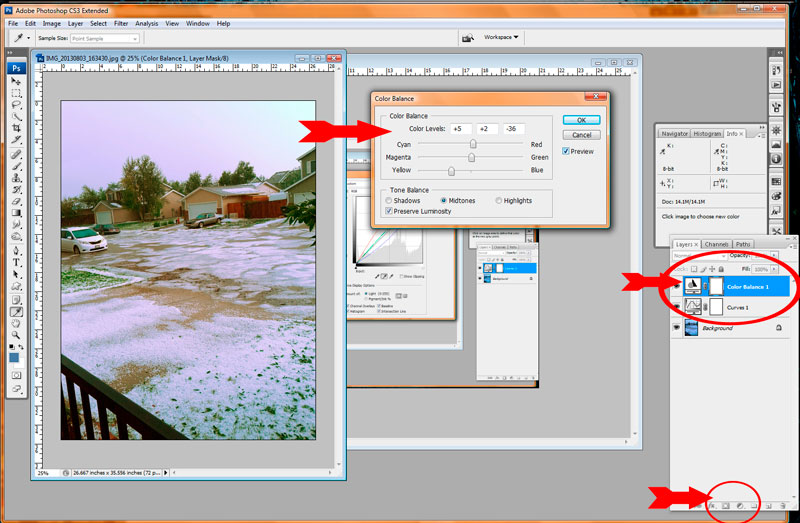
I decided, though, to let a different adjustment layer do some work, as an introduction. I opted to try the Color Balance adjustment layer, to toy with the color effects. Here’s how that turned out:
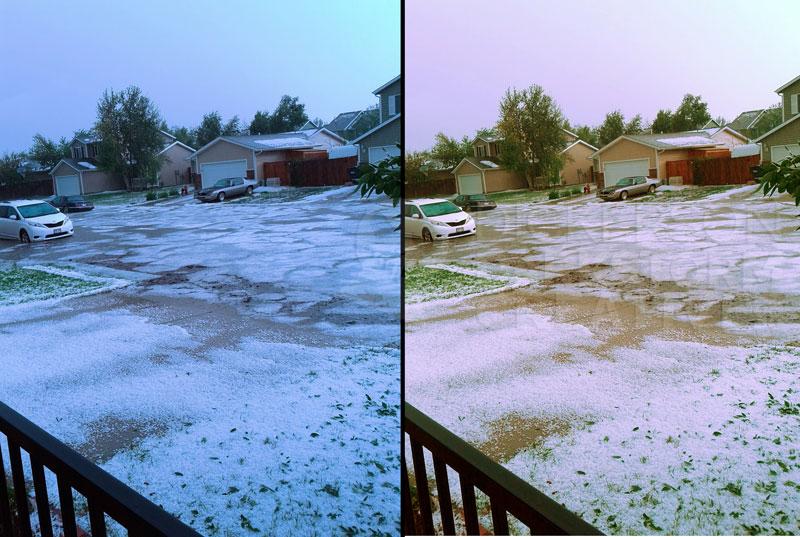
Here’s the final version of the image, more or less color corrected. For publication, or printing, I’d spend more time on it to get it a bit closer to reality. But I’m happy with it.
Here’s what the original and final images look like right next to one another. In the comments, let me know how you work with color correction. I’ve worked with and seen many ways to do it, this is merely one idea.


2 Comments
Abby Embley · Nov. 13, 2013 at 5:46 am
Nice tips about color correction. This tips are very useful to our graphic designers…. Thanks for Sharing…
rhdickerson · Nov. 13, 2013 at 6:56 am
Thanks for checking it out! There really are lots of ways to color correct too, including channels, color balance, selective color, and so on. This method usually works quite well, but often a combination of techniques works best.
Comments are closed.