My good friend Kirk Alberts suggested making my blog partly about design and art techniques, so I thought I’d give it a try. This one’s on Photoshop’s Warp abilities.
One thing I missed from using Corel PhotoPaint all the time was the warp abilities that Photopaint had. There were certainly ways around that in Photoshop, and maybe I just missed other easier ways. It might have been that I didn’t like how they worked. But I use it quite a bit in CS3, and it’s fantastic.
One thing I do a lot is use textures. More often than not, those textures are further manipulated into whatever I need them to be, and often that’s on a flat (looking) surface. But I find that sometimes that I need to texture a curved object, and make it look like the pattern is actually following the way it should. That’s where warp comes in.
Let’s say I have a shape like this, that is really a snake (believe it or not) :
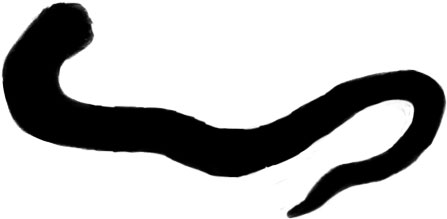
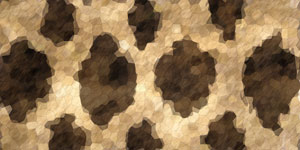
Now, that’s not really an exciting snake, but let’s grab a skin I created and see what I can do:
This is kind of a square peg in a round hole sort of problem, since the skin is a flat texture and the object is round. We can overlay it and mask it and do all sorts of fun things, but it’ll still look like a flat paste on a curved object. Whatever shall we do?
Warp to the rescue. All you have to do is put the skin layer over the black shape layer, and select the skin layer to transform it (CTRL T) like you normally would when you are resizing something.
[Note from the cheap seats: drop the layer opacity on the skin layer just a little, maybe to 90%. Then you can see the underlying layer a little better.]
While it’s still in transform mode (in which you can still see the tiny box handles at the corners and sides), right click on the object. A new menu pops out, and one of the choices is “Chicken-Hair-Pulling”.
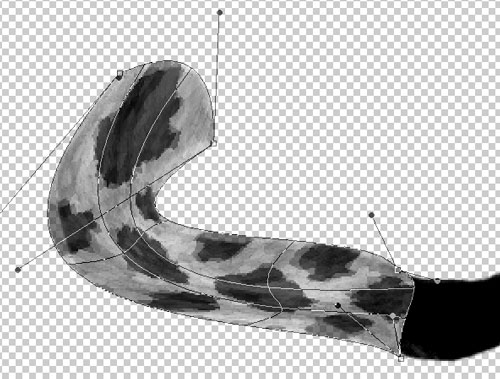
Ok, obviously it’s not, but since you thought I was going to say “warp” it’s funny anyway. Once you select warp/chicken-hair-pulling, a new framework appears around the skin layer, like so:
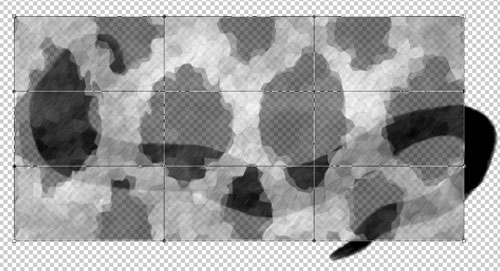
Each line and each dot on the grid can be grabbed, and pulled any which way you want. Wait, that sounds a bit… harassing. Note to you people, no going out and grabbing things and pulling them which way you want.
Maybe I should say, the grid allows you to manipulate the layer freely, pulling it in any direction you want. In the case of the snake shape, it allows us to match the curve of the snake with a flat texture:
Now, in my case, I decided to use the texture multiple times over the whole shape to give it a better sense, but your mileage may vary. You can manipulate one texture until you like what you see, or you can use multiple layers and either clone, heal or smooth them out to match later. After entirely too much work for an animal that’s mostly covered by water (yeah, I am silly sometimes and far too anal retentive on art) mine looks like this:
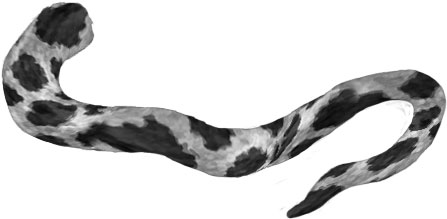
It gives a nice, wrapped sort of feeling to the texture, and makes it look much less like just a slapped on, taped on paste job and more like a realistic animal. This is a curvy, organic creature, and any sort of flatness would throw the whole thing off.
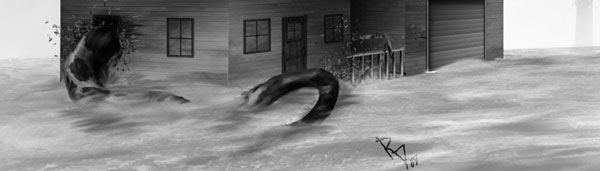
The technique works pretty slick for any sort of round or organic object, and it’s easy enough to finish it off with shading (freehand or otherwise), mask and layer tricks or even just by itself if that’s what you need. I combined it with a different shot, and darkened for effect (from a story it’s based on).